Careful, though — it might spoil you for everything else …
In the Appalachian foothills of Georgia and North Carolina, it’s easy to spot a good barbecue shack — you smell it before you see it. It’s that unmistakably intoxicating blend of hickory smoke, pork, and spices.
Inside, you likely won’t find beef or chicken or ribs, and no thick, sticky sauces either. What you will find is pulled pork shoulder in a slightly sweet and spicy vinegar sauce, served with coleslaw, sweet tea, and (if you’re lucky) Brunswick stew.
Welcome to the world of Piedmont barbecue, one of the true pleasures of travel in the rolling hills just below the southernmost Appalachian mountains. If you can’t get here, well, don’t fret because I’m going to show you how to fix it yourself at home.
What is barbecue?
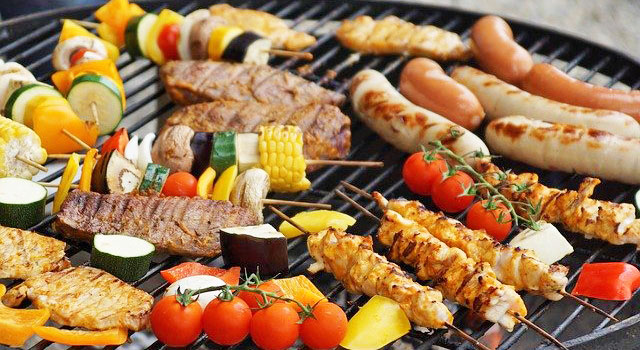
First, let’s get our terms straight. If you’re from New England or Australia or pretty much anywhere outside the US Southeast or Texas, you might use the word “barbecue” for cooking over open flame, like this:
In the American South, that’s not barbecue; it’s grilling. Traditional barbecue combines three key elements:
Meat — usually pork or beef, but also chicken, goat, mutton, and on the Gulf coast alligator as well
Indirect heat — from wood fire or embers
Spices — from a dry rub, mopping sauce, or dressing
The original technique of meat-smoking was imported to the mainland from the Caribbean by the Spanish. When British colonists added vinegar-basting to the pork, “barbacoa” became American style barbecue — specifically, what is now called Carolina style barbecue.
As barbecuing spread outward from Carolina and Virginia, three other distinct styles developed. Texas style tends toward beef smoked over mesquite with hot peppers. Memphis style incorporates the sugar and molasses traded along the Mississippi River, giving the meat a sweeter taste. In Kansas City, the Texas and Memphis styles merged, pretty much any meat became fair game, and the thick and sticky “barbecue sauce” we know today was added to the mix.
Piedmont barbecue is a variety of the Carolina style, using pork shoulder rather than whole hog, with a slightly spicy dry rub or mop, a mildly spiced vinegar-based dressing, and a semi-sweet vinegar and tomato sauce. Now that you know, let’s get cooking!
Cooking “low and slow”
Barbecuing a pork shoulder yields several pounds of meat and takes about 48 hours from start to finish, so you’ll want to save it for gatherings. You can cook the top shoulder, also called a “Boston butt”, or the lower portion, called the picnic, or the whole leg if you’re feeding a crowd. Make sure the cut you get is not deboned.
Naturally, you’re going to need a generously sized smoker and a couple of large containers for brining and pulling, as well as an ample platter. This recipe is my adaptation of Elder Ward’s method, rub, and dressing, with my own sauce. I make it mild, so feel free to spice it up to your taste.
The most important thing to remember is that to get rich, juicy, falling-off-the-bone tender pulled pork from a shoulder cut, you have to cook the meat over a low temperature for several hours. If you cannot control your smoker’s internal temperature electronically, save this recipe for summer so you don’t drop too low overnight.
Step 1: Brining
Your typical barbecue shack will skip brining and dry rub in favor of a mop, because it’s easier, quicker, and cheaper when you’re smoking large quantities of pork every day. Plus, the smoking pit is large enough that you don’t have to worry so much about heat loss. But for home style, it works well because it means less work once the meat’s in the smoker, and it creates a savory “bark” on the pork that adds a wonderful zing to the flavor.
Two days before serving, trim the excess fat off your pork shoulder and place it in a container with a sweet brine mix — dissolve one cup of sugar and one cup of salt per gallon of cold water. Some folks recommend not using iodized salt because they say it adds a bitter or metallic taste. Cover the meat and chill overnight.
Contrary to a popular myth, the brine will not tenderize the shoulder. It will only affect a thin layer on the exterior. The purpose is to prime the meat for the dry rub and facilitate a flavorful smoke ring on the outside.
Step 2: Dry rub
The next day, remove the pork shoulder from the brine and dry well with a cotton towel. Then cover the shoulder completely with dry rub, well packed. Let the meat stand for at least an hour to bring the temperature up and allow the rub to cure.
You’ll find a recipe for a Piedmont style dry rub at the end of this article. If you have your own rub recipe, you may use that, but be aware it might not give you a true Piedmont barbecue flavor. I do not recommend buying prepared rubs, as they are expensive, unless you will have no use for the leftover spices.
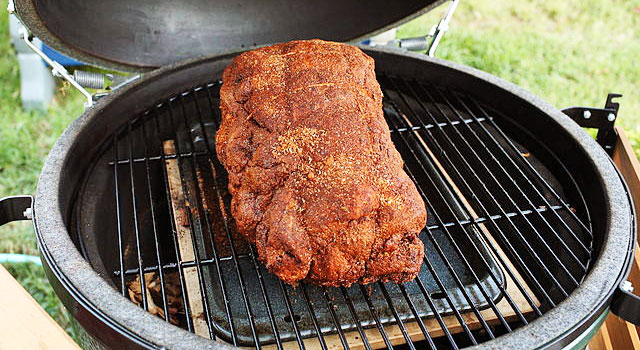
14 lb (6.35 kg) pork shoulder with dry rub before cooking on a ceramic smoker (image by Matthew Field)
Step 3: The grill
It is extremely important to use lump wood charcoal only, along with hickory for smoke and flavor. No briquettes or fluids.
Also, do NOT use soaked hickory chips with this recipe, no matter what your brother-in-law tells you. You need a dry smoke here. The meat will get all its juices from the slow-melting fat. Adding moisture will only turn your dry rub into a gunky mess instead of the crisp, crunchy bark you’re looking for.
So practice beforehand: “Brad, you’re wrong, now get the hell away from that smoker.” Repeat until you’ve got it down pat.
I use a variation of Elder Ward’s “single lump” method with added chips. This setup is for a ceramic smoker. Your smoker may require a different loading, but what’s essential is to produce a dry hickory smoke.
Load the smoker with large lump charcoal pieces to about 3” (2.5 cm) below the top of the firebox. Then fill in with smaller pieces.
Place a single fist-sized chunk of hickory on top of the charcoal in the center. Now repeat the larger-then-smaller method to fill with lump charcoal up to the top of the firebox around the hickory chunk, scattering a handful of dry hickory chips in along with the small stuff. (If you want a hickory aroma for your gathering as the meat finishes, use another hickory chunk on the bottom before adding your charcoal.)
Open your top and bottom vents fully. Use a natural starter to light the charcoal, no chemicals. Lower the lid and let the internal temperature get up to 400° or so Fahrenheit (a little over 200° C).
When the charcoal is well lit, add your deflector to protect the meat (see above illustration using a deflector and drip pan). Remember, you need indirect heat here. Never expose barbecue to flame!
Step 4: Smoking
Now bring out the pork. Make sure your rack is clean and lightly oiled. You can use a flat grill but I prefer a V rack. Place a remote meat thermometer into the thickest part of the shoulder away from the bone. You want to be able to check the internal temperature of the pork without opening the smoker. It’s perfectly fine to use a corded thermometer and close the lid around the cable.
Now dial down your vents nice and narrow. Place the shoulder in the smoker and close the lid. The wood will begin to smoke with a rich hickory scent. You will leave that lid closed until the meat is done. Trust me, there is nothing you need to see while the shoulder is cooking.
Set your vents so your smoker temperature stabilizes at around 195° F (90° C). You’ll probably be doing this in the evening and leaving the smoker overnight.
When the meat’s internal temperature reaches about 170-180° F (around 80° C) it will stop rising. This will take several hours. Now open up your vents to raise the smoker temperature to 300-350° F (about 150–175° C) and hold it in that range until the meat thermometer reaches 200° F (93° C). At that point, the meat is ready to be taken off.
That may sound a little high if you’ve never made barbecue, but trust me here. This isn’t a pork chop. You don’t get the tissue breakdown you’re looking for until about 195° F (90° C). Allow the meat to rest until the internal temperature reaches about 170° F (77° C).
Total cook time will be approximately 90 minutes per pound, plus a couple hours for cooling and pulling. Use that as a guide to back-schedule your starting time based on when you expect to be serving guests.
Step 5: Pulling and dressing
You will need thermal food gloves to pull the pork. If you’ve done it right, the meat will literally fall off the bone and almost fall apart in your hands. Remove any remaining bits of gristle. (There shouldn’t be much.) I pull the pork by hand, but you can also use pork-shredder “claws”.
Place the pulled pork in a large basin and toss it with vinegar dressing. I highly recommend using the recipe at the end of the article for an authentic Piedmont flavor. If you like it hot, add more peppers, but otherwise don’t mess with it too much. Start with one cup, then add in a second cup in portions until the meat stops absorbing the vinegar sauce. Drain any excess.
To keep the ’cue warm without drying it out, I recommend using a large chafing dish with a water reservoir and a lid. The barbecue can be served as a meat course or made into sandwiches. Serve with maple/onion sauce (or molasses/onion sauce for a more traditional flavor) on the side. I always urge my guests to try the pork as-is before deciding to add any sauce to it.
There are infinite variations on the essential Piedmont theme. There are all kinds of sauce, rub, and dressing recipes. The keys to Piedmont flavor are the hickory smoked pork, the basic spice mix, and the vinegar. If you use different meats, radically different spices, and any other sauce base (like a South Carolina mustard sauce or a Kansas City style sticky sauce), it’s not going to taste like what you get at those roadside barbecue shacks along the foothills.
While these instructions might seem intimidating at first, it’s actually pretty easy once you get the hang of it. Don’t be afraid to tinker with the rub and sauce recipes. There’s nothing more satisfying than finding your own signature flavor to add to the barbecue pantheon.
As always, have fun and enjoy!
Dry Rub
This rub is for a sweet brined pork shoulder. If using a straight brine (without sugar) double the sugars in the rub. If smoking an unbrined shoulder, also double the salt.
4 Tbsp. paprika
2 Tbsp. black pepper
2 Tbsp. powdered sage
2 Tbsp. ground cumin
1–2 Tbsp. cayenne pepper (omit for mild, double for hot)
1 Tbsp. salt
1 Tbsp. powdered rosemary
1 Tbsp. powdered onion
1 Tbsp. powdered garlic
1 Tbsp. granulated sugar
1 Tbsp. brown sugar
Blend all ingredients in a bowl with a fork. Makes about 1 cup. Covers 1 whole leg (butt + picnic).
Pulled pork dressing
2 C. white vinegar
2 C. apple cider vinegar
1 Tbsp. granulated sugar
1 Tbsp. powdered garlic
1 Tbsp. powdered onion
1 Tbsp. hot sauce (double, or more, for a hotter dressing)
1 tsp. salt
1 tsp. black pepper
1 tsp. powdered sage
Combine vinegars and hot sauce. Dissolve sugar and salt in the liquid. Add remaining ingredients, shake well, and allow to sit overnight. Shake well before use. Do not chill before dressing the pork. Makes about a quart.
Vidalia-maple barbecue sauce
1 pureed Vidalia onion (or other sweet onion)
1 C. water
1 (one) 6-oz. can tomato paste
1/2 Tbsp. cold bacon grease + 1/2 Tbsp. olive oil (adjust ratios to your taste)
4 Tbsp. maple syrup (substitute molasses for a more traditional flavor)
1 Tbsp. Worcestershire sauce
1 Tbsp. hot sauce (increase for hotter sauce)
2 Tbsp. apple cider vinegar
1/4 C. dark brown sugar
3 cloves garlic, put through a press
1/2 tsp. black pepper
1/4 tsp. crushed red pepper (increase for hotter sauce)
1/2 tsp. dry mustard
1 tsp. salt
Liquify the onion in a food processor. Warm the puree over medium heat in a saucepan with the water and tomato paste.
Add the bacon grease + olive oil, maple syrup, Worcestershire sauce, hot sauce, and vinegar. Stir in until thoroughly mixed. (If you do this in order, you can use your Tbsp. measure all at once without having to clean it.)
Add the brown sugar and garlic. Stir in until sugar is dissolved.
Add the peppers, mustard, and salt. Stir well to blend.
Let simmer uncovered, just below a boil, for at least 20 minutes, stirring occasionally.
Remove from heat, allow to cool. Store in glass container in the refrigerator. Makes about a quart.